Transfer Case Stop Leak: A Solution Guide
Transfer cases often develop leaks over time. This can be a headache for most car owners but can be easily fixed.
So, how to transfer case stop leak?
To stop the leak of your transfer case, simply loosen the transfer case vent cap. If that does not fix the leak, use a transfer case stop leak product to temporarily solve this issue. For a permanent fix, replace the gasket in the transfer case. Additionally, you can replace the leaky transfer case altogether with a new transfer case.
Are you still confused about how to fix your leaky transfer case? Read this article to learn all about it.
How to Fix The Transfer Case Leak
There are 4 solutions you can try to fix your transfer case leak.
- Loosen the transfer case vent cap.
- Use a transfer case stop-leak product.
- Change the transfer case gasket.
- Change the transfer case.
So, let’s get down to the detailed solution.
Solution 1: Loosen The Transfer Case Vent Cap
- Locate the transfer case vent on the top of the transfer case. It is a small pipe that sticks out of the case as shown here:

- Grab the transfer case vent cap on top of the vent.
- Move the vent cap around to ensure that it is freely moving.
Solution 2: Use A Transfer Case Stop Leak Product
Using a transfer case stop leak product can help mend the situation. Here’s how you do this:
Materials Needed:
- A socket wrench kit
- A funnel
- A cleaning rag.
- A Leak-stop additive product. Firstly, check your vehicle’s owner’s manual to determine the type of transmission fluid your vehicle requires. Choose a stop-leak product that is compatible with your vehicle’s transmission fluid. For example, BlueDevil, Lucas Transmission Fix, or ATP AT-205 Re-Seal are popular stop-leak products.
Working Procedure:
Here are the general steps to use a stop-leak product for your transfer case:
- Follow the instructions on the product label carefully. The usable amount of the product will depend on the transfer case’s size and the severity of the leak.
- Locate the fill plug on your transfer case. The fill plug is typically located on the side of the transfer case and may be labeled as “fill” or “level.”
- Clean the area around the fill plug to prevent dirt or debris from entering the transfer case.
- Remove the fill plug using a socket wrench or other appropriate tool.
- Insert a funnel into the fill plug opening.
- Add the stop-leak product to the transfer case through the fill plug opening.
- Replace the fill plug and tighten it securely.
- Start your vehicle and allow it to run for a few minutes. This will circulate the stop-leak product through the system.
Precautions:
You should be careful when using a stop leak additive in your transfer case for these reasons:
- The stop-leak additive will treat the good seals as well. This can result in the good seals getting damaged over time and producing more leaks. So, you will have to replace all the seals in the future instead of just one or two.
- If the bad seals have rips in them, this additive will not be very helpful in sealing the leak.
- The damaged seal will start leaking again in the future.
Solution 3: Change The Transfer Case Gasket
Changing the transfer case gasket can help stop the leak.
Materials Needed:
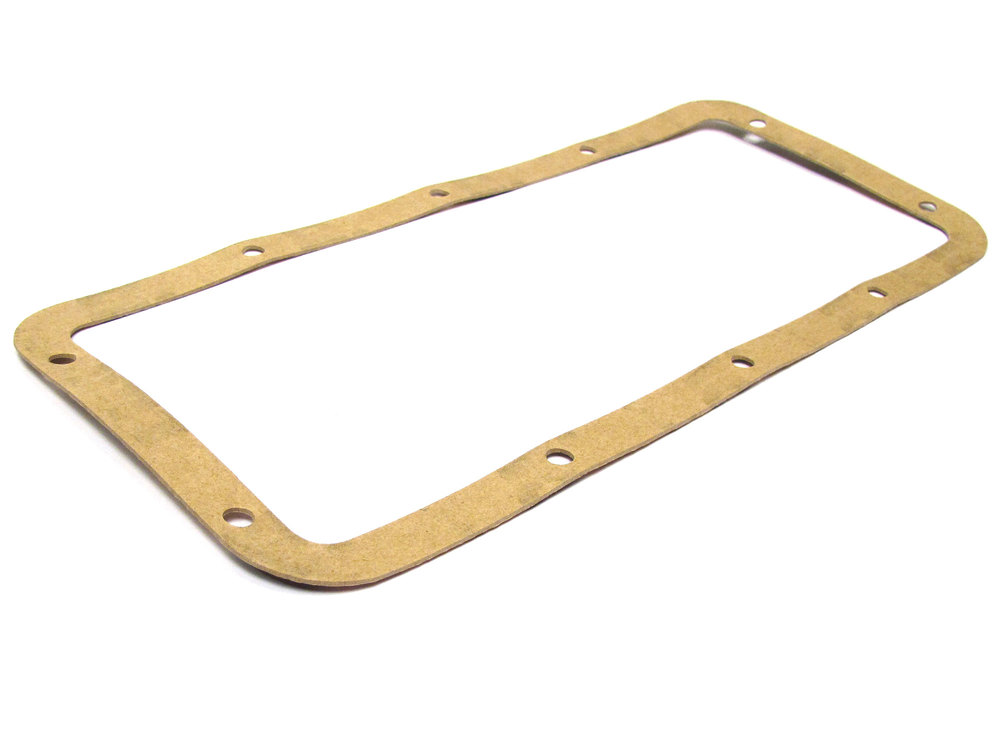
- A new gasket. The gasket should be compatible with the model of your transfer case. You will find the transfer case model of your car on the sticker underneath the transfer case.
If the sump is leaking, you need a sump gasket as shown here:
But if the connection between the transmission and transfer case is leaking, you need an adapter gasket instead. This is an adapter gasket for a transfer case:

- A wire brush.
- A drip pan.
- Transfer case fluid. You need to get the fluid that is compatible with your transfer case. You will find this information in the car owner’s manual of your car.
Working Procedure:
Here’s a step-by-step guide to changing the transfer case gasket.
- Park your vehicle on a level surface and engage the parking brake. If the Range Rover lowers when parked, fix that issue first.
- Disconnect the negative battery cable.
- Raise the vehicle using a jack and support it with jack stands.
- Drain the transfer case fluid into the drip pan using the drip plug underneath the case.
- Remove the bolts that secure the transfer case to the transmission.
- Carefully lower the transfer case and remove it from the vehicle.
- Clean the mating surfaces of the transfer case and transmission with a suitable solvent. But if the sump gasket is leaking, clean the sump mating surfaces instead.
- Remove the old worn-out gasket and clean the gasket surfaces with the wire brush.
- Install the new gasket onto the transfer case.
- Carefully lift the transfer case back into position and secure it to the transmission with the bolts.
- Refill the transfer case with the recommended transfer case fluid.
- Reconnect the negative battery cable.
- Start the engine and check for leaks.
Your transfer case gasket has now been replaced. If you are having trouble understanding how to change the transfer case gasket watch this video:
Solution 4: Change The Transfer Case
You can also change the entire transfer case altogether with a new one to stop the leak. A transfer case replacement can cost $2,500 to $8,000 depending on the model.
Materials Needed:
- Socket wrench kit
- Floor jack
- Jack stands
- Gasket/crush washer kit for the transfer case and differential service
- Transfer case-compatible oil
- Shop towels
- Brake cleaner
- A transfer case that is compatible with your car. You will find the model number of your existing transfer case on a stick at the bottom.
Working Procedure:
Follow these steps to replace your leaky transfer case:
- Raise the vehicle and support it securely on jack stands.
- Remove the transfer case and transmission skid plate bolts. Then remove the skid plates if equipped.
- Drain the old transfer case fluid by removing the drain plug. Let the fluid drain into a drip pan.
- Remove the front and rear driveshafts.
- Unplug the electric shift motor connector and disconnect the harness clips.
- Remove the bolts that connect the transfer case to the transmission and the driveshaft.
- Lower the transfer case using a floor jack.
- Install the new transfer case onto the transmission and the driveshaft.
- Tighten the bolts that connect the transfer case to the transmission and the driveshaft.
- Install the drain plug if not installed already.
- Fill the new transfer case with the recommended amount of gear oil.
- Install the fill plug with new crush washers.
- Reconnect the electric shift motor connector and the harness clips.
- Reinstall the front and rear driveshafts.
- Reinstall the transfer case and transmission skid plate bolts and skid plates if equipped.
- Lower the vehicle from the jack stands.
- Test drive it to ensure that the transfer case is working properly.
Your transfer case has now been installed successfully. If you need more help understanding how to remove the transfer case, watch this video:
Can You Drive Using A Leaky Transfer Case?
Yes, you can drive using a leaky transfer case. This is because leaky transfer cases rarely develop large leaks.
Simply topping up your transfer case fluid from time to time can be adequate for most people. But if you are having to add transfer case fluid often, then you should fix the leak. Having low transfer case fluid can cause friction and cause the case to overheat and wear out.
If the transfer case wears out, you may get a transmission system fault error message as well. If your transmission system breaks down in the middle of the road, send an SOS signal.
However, sometimes your Range Rover may show a limited SOS functionality message. This can make calling for help somewhat difficult. So, maintain the transfer case regularly to avoid breaking down on the highway.
Frequently Asked Questions (FAQs):
What Is A Transfer Case VS Differential?
A transfer case channels power to the two differentials located on the two axles. A differential, on the other hand, channels power to the two wheels located on each axle. Both are straightforward mechanical devices. But you should ensure that they are working properly.
Why Is It Called A Transfer Case?
It is called a transfer case because it transfers power to the drive shaft from the engine. The transferred power is then sent to the differentials of the vehicle. The transfer case is an important part of the transmission system for this reason.
What 3 Types of Transfer Cases Are Available?
3 types of transfer cases that are available are part-time 4WD, full-time 4WD, and active 4WD. Among these three, the part-time 4WD is the most commonly found. The part-time 4WD lets you choose between 2 WD and 4 WD. It can also switch between the 4 WD high range and the 4 WD low range.
Conclusion
So, now you know all there is to know about the Transfer Case Stop Leak.
Transfer cases are a very important part of your transmission system. So if your transfer case develops a leak, you should try to get it fixed immediately. I hope reading this article helped you fix your transmission case leak easily.